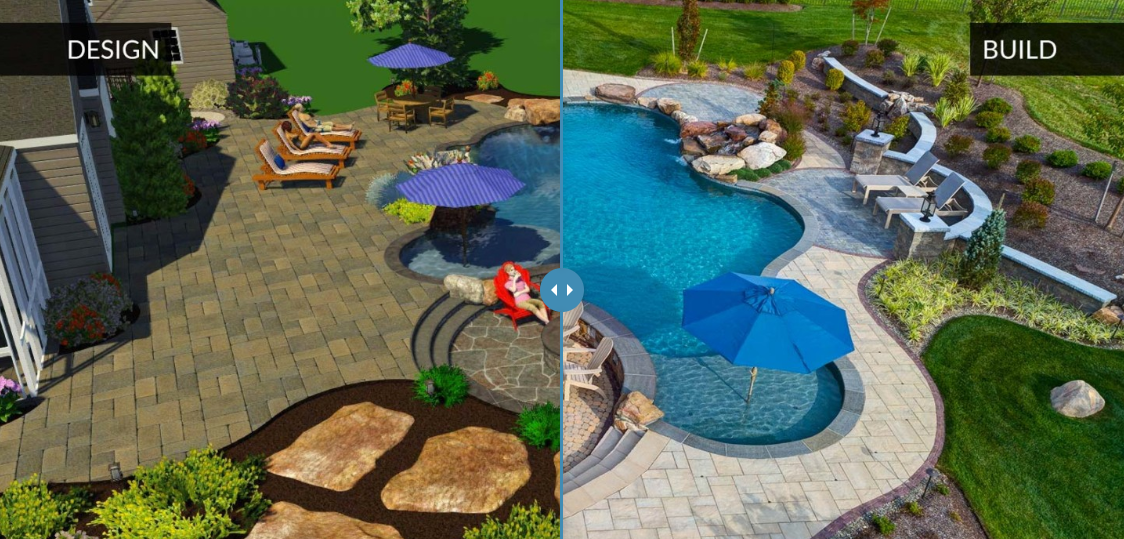
Within a few moments of describing the process for building a custom gunite swimming pool, you’ll quickly realize that this is very different from the process of installing a fiberglass or vinyl liner pool. Foremost, a gunite swimming pool is fully customizable. Rarely will two pools be the same – which is why they’re great for people who want a unique shape or size that they know is one-of-a-kind and specially designed to maximize the use of their outdoor space.
To understand the process for building a custom gunite swimming pool, we want to walk you through the various steps so you know what to expect and also why this process is so unique – take a look!
On-Site Consultation
Because gunite pools are custom designed and built, the process begins by meeting with the client on their property. We want to see the space, take measurements and account for the unique aspects of the property we either want to alter or work with. This also allows the client to show us their vision for the space and challenges they wish to overcome.
3-D Design Process
Next, we take a client’s wish list and conceptualize an initial design. With the use of our Pool Studio Design Software and an Oculus Rift VR Headset, we are able to show clients all angles of this design. This virtual experience helps people to visualize their back yard space and the potential it has to be a one-of-a kind Aquavisions pool.
We then work closely with each client until a final design is agreed upon. Even if it takes many rounds of revisions, we don’t stop until it’s the perfect balance of beauty and function and works within the client’s budget.
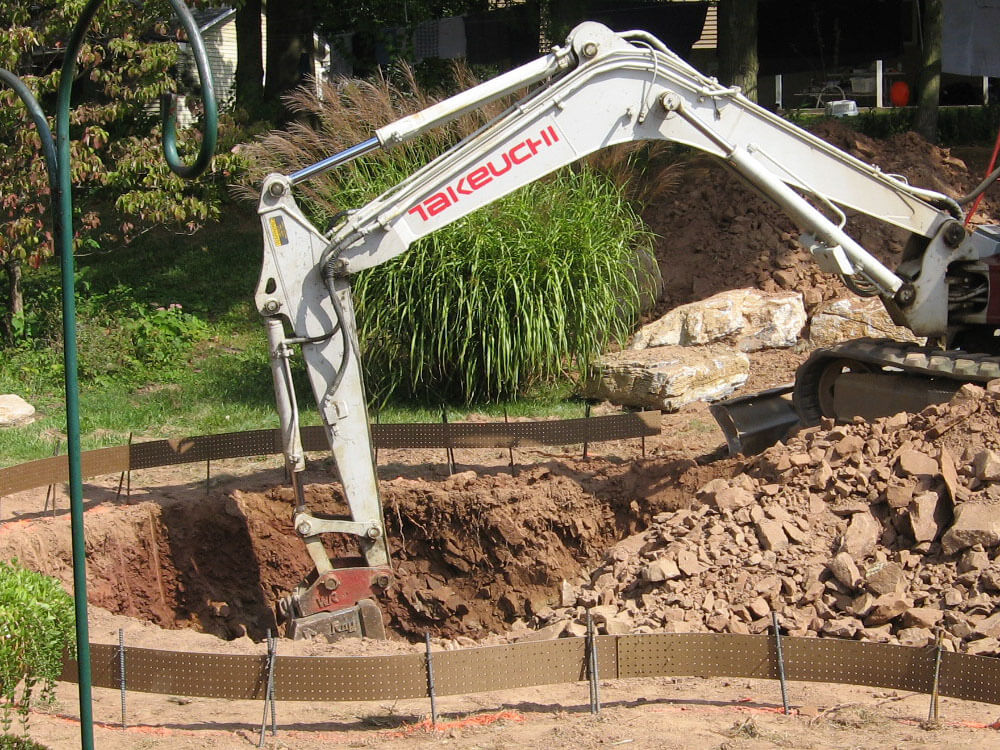
Grading and Excavation
The physical process begins by grading and leveling the property. Next, the pool is painted out and formed using 6 inch strips of peg board and half inch steel rebar. The excavator carves the actual shape of the swimming pool directly into the earth until the desired depths are reached. Finally a six inch base of stone covers the entire bottom of the excavated pool shape.
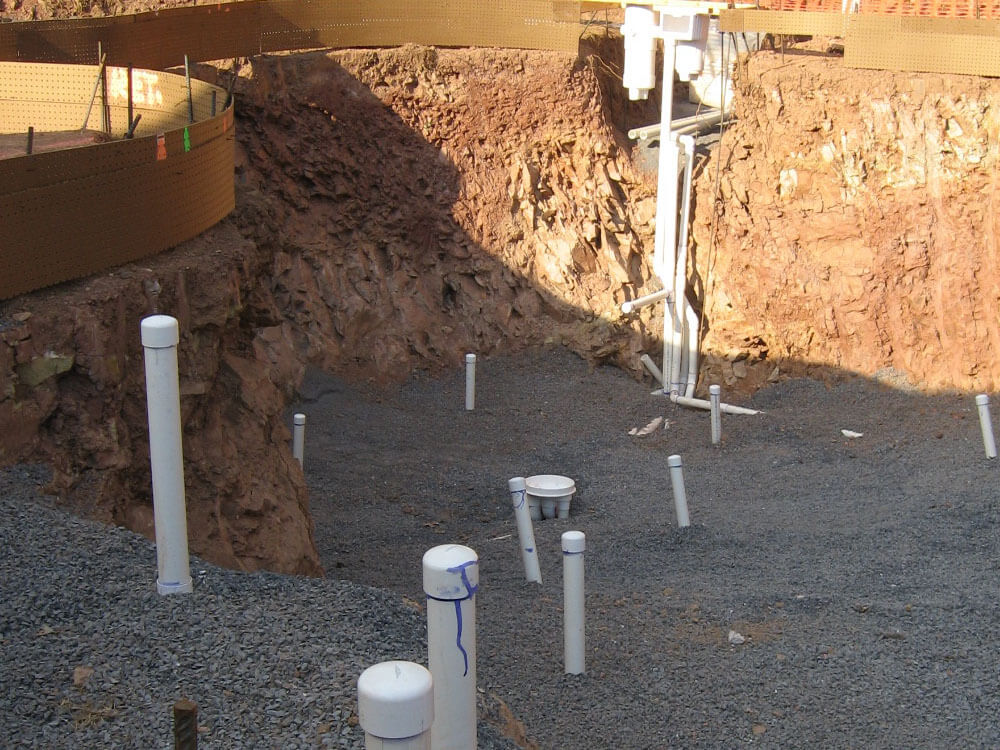
Installing Plumbing
Once the pool is dug and the stone is placed, all necessary plumbing is installed. This is a critical piece of ensuring a pool is functional and can be properly maintained over time.
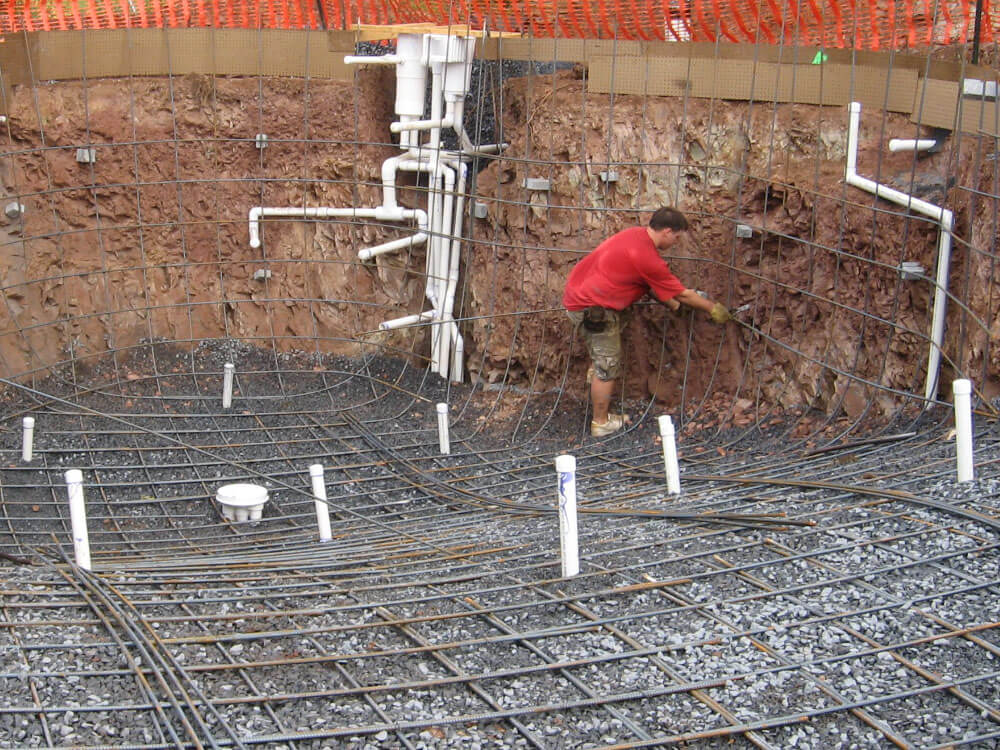
Building Rebar Cage
After the plumbing is completed, a steel cage is constructed using half-inch rebar to reinforce the concrete shell. This will become the backbone that helps to give the gunite its desired form.
Installing Lights and Electric
Next we install the lights and electrical bonding of the pool. Depending upon the design of the pool, this step can be fairly simple or extremely complex. Additionally, all of plumbing lines are air tested to ensure that all connections are properly sealed and there are no leaks in the lines.
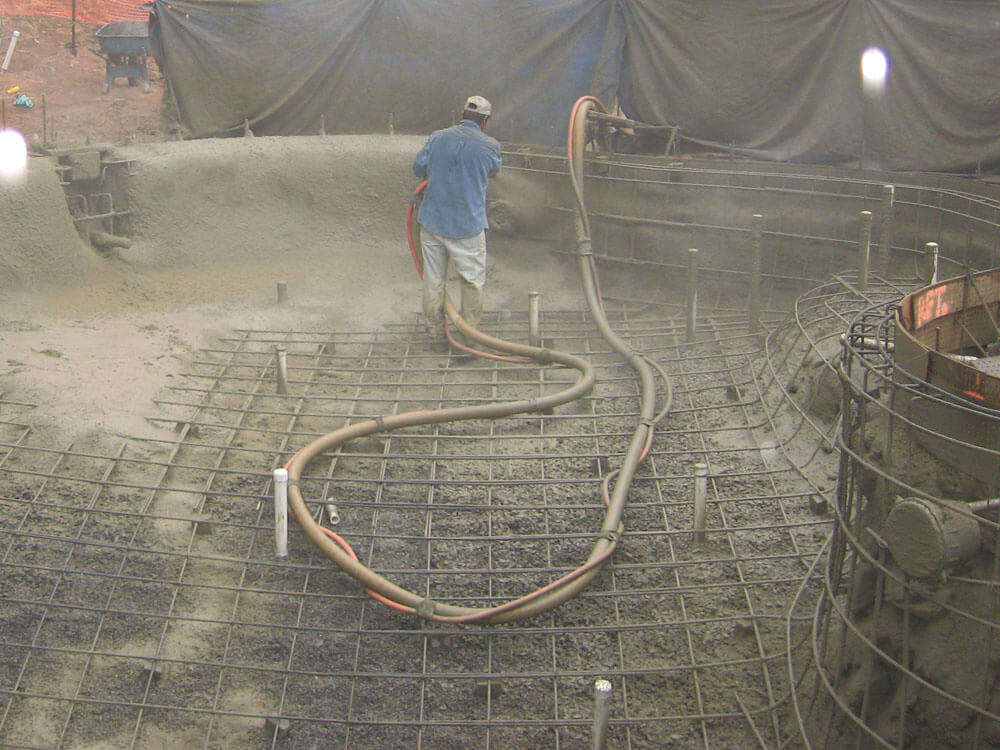
Shooting and Forming the Gunite
Let the fun begin! Three inches of gunite is shot under the steel cage of the pool floor. Three more inches of gunite is added on top for a total floor thickness of six inches. After the gunite application is complete, the forms are removed.
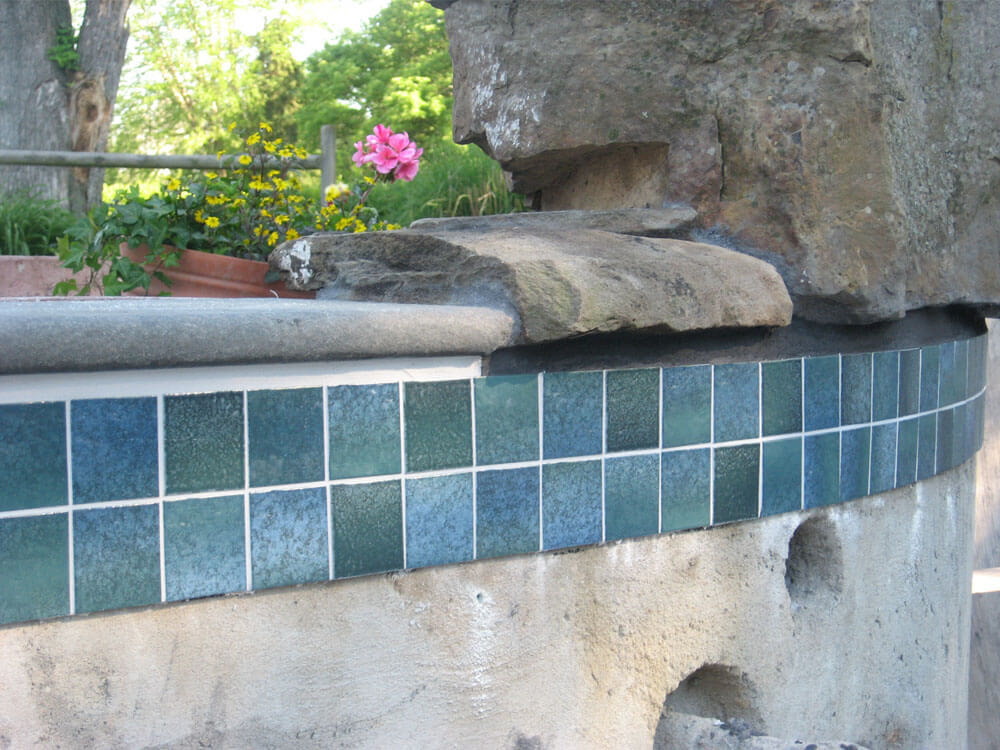
Coping, Tiling and Rock Detailing
If the pool design contains natural rock detailing such as a waterfall or jump rock, the boulders will be moved into the correct placement and eventually mortared. Also, a six inch band of decorative tile is installed around the entire pool perimeter and the radius bull-nosed coping is placed above the tile for a fully finished look.
Hardscaping & Landscaping
Before any more work can be done on the pool, the hardscaping and landscaping finishes around the pool must be completed. This includes patios, landscape beds and fencing.
Pebble-Tec Interior Finish
The Pebble-Tec interior is sprayed and troweled over the gunite. This is an aggregate plaster material that is available in 3 textures and 48 colors to provide clients with ultimate flexibility to reach their desired look and feel. One day later we return to acid wash the Pebble-Tec which removes excess plaster and exposes the beautifully colored pebbles within the finish.
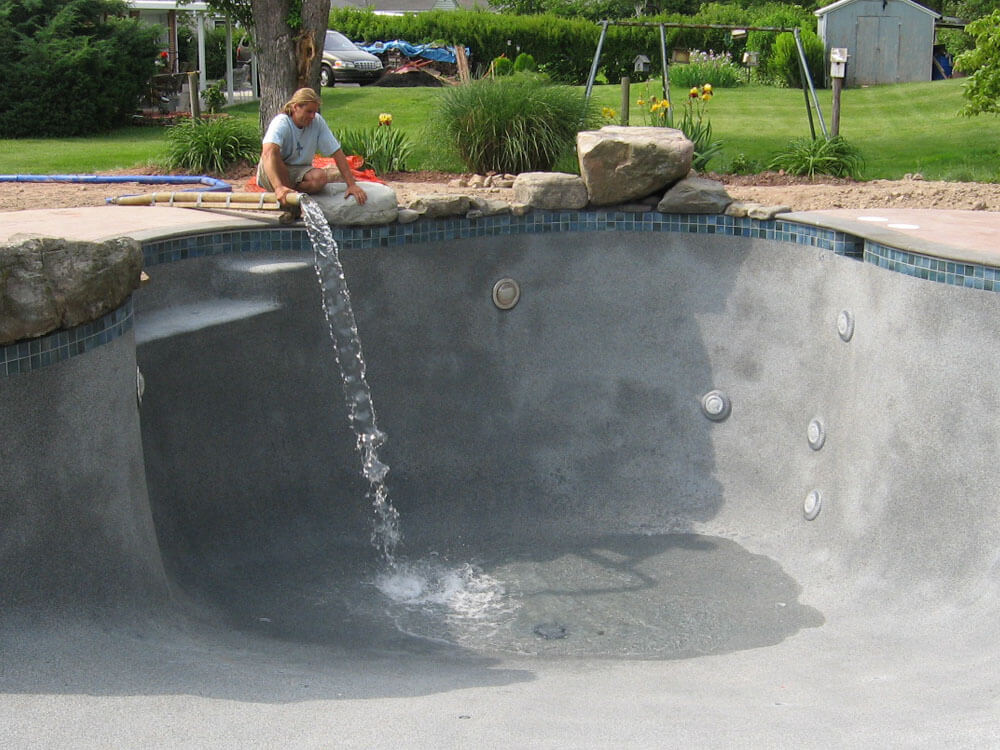
Adding Water
This is the step that really brings the pool to life! Chlorinated water is trucked in and added to the pool until it reaches the appropriate level in order for the pool’s pumps and filter to function.
Professional Orientation
Upon completion of the project, we will schedule an orientation with one of our pool professionals who will guide you through all of the important processes so you feel fully comfortable with your pool and to ensure it functions properly.
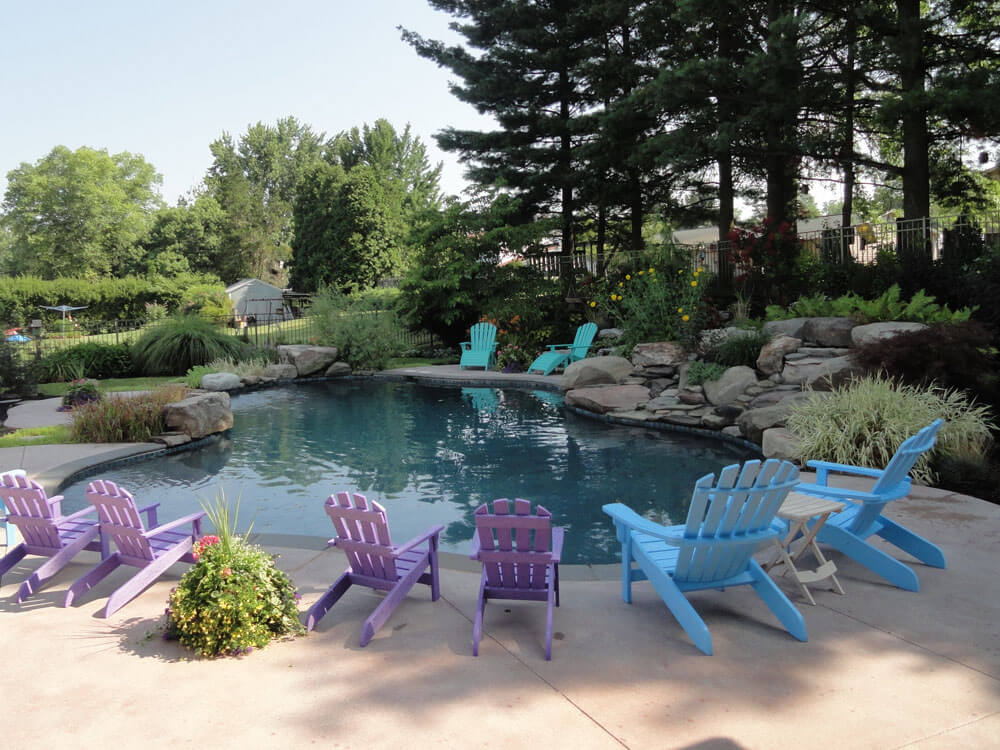
Enjoy your finished pool!
Throughout all of these steps, none is more fulfilling than seeing our clients’ reactions to their brand new gunite swimming pool. We love receiving photos and hearing stories of all the fun memories that are built within this new spacec. Most importantly, we remain available to answer any questions that might arise and to assist with the opening and closing of the pool each season. When you own an Aquavisions pool, you become a valued member of our family for life!
Want to learn more? Check out this video clip that shows the time-lapse of our building process all in about 2 minutes!
**Note: This is a very generalized and simplified description of the process. Every pool build is unique and can change depending upon the style and scope of project.**